


Winter Project 2011.5.0 Rears in Arrears.
I've documented a few of the changes that I've made to the front end of my Fireblade, but I haven't really explained all the changes I've made to the rear - so now it's time to pay up! I tried my best to keep the front end of the bike as simple and elegant as possible, while still creating my own unique "face" and using this to accentuate the broad shoulders of the frame spars. I wanted my headlight to be small and discreet, to blend into the forks and triple trees, and I feel I've succeeded nicely. The powerful HID works exceptionally well and has held up to the abuse of rainstorms, hard landings from wheelies and 10-15(!) foot jumps up and down Mansell St. If you use Google street view, you'll see the four distinct crests coming up from the freeway exit, and while a seat bounce at 45 MPH will get your wheels in the air, a blast up any of these at 60+ will almost clear both lanes of cross traffic and allow you to land on the next rise . . . . but I digress.
Back to the rear end. Hiiiiiiii-Yah!
I'd been riding the bike for some time using a modified stock rear swingarm, housing my 999S wheels (added swingarm spools and a pin for the rear Brembo brake caliper hanger, captive spacers to adapt to the larger rear wheel bearings on the stock steel 900RR axle). I really enjoyed riding the bike in this configuration, but the suspension wasn't balanced well and I felt more confident in the completely original set up . . . so there would surely be more changes to come.

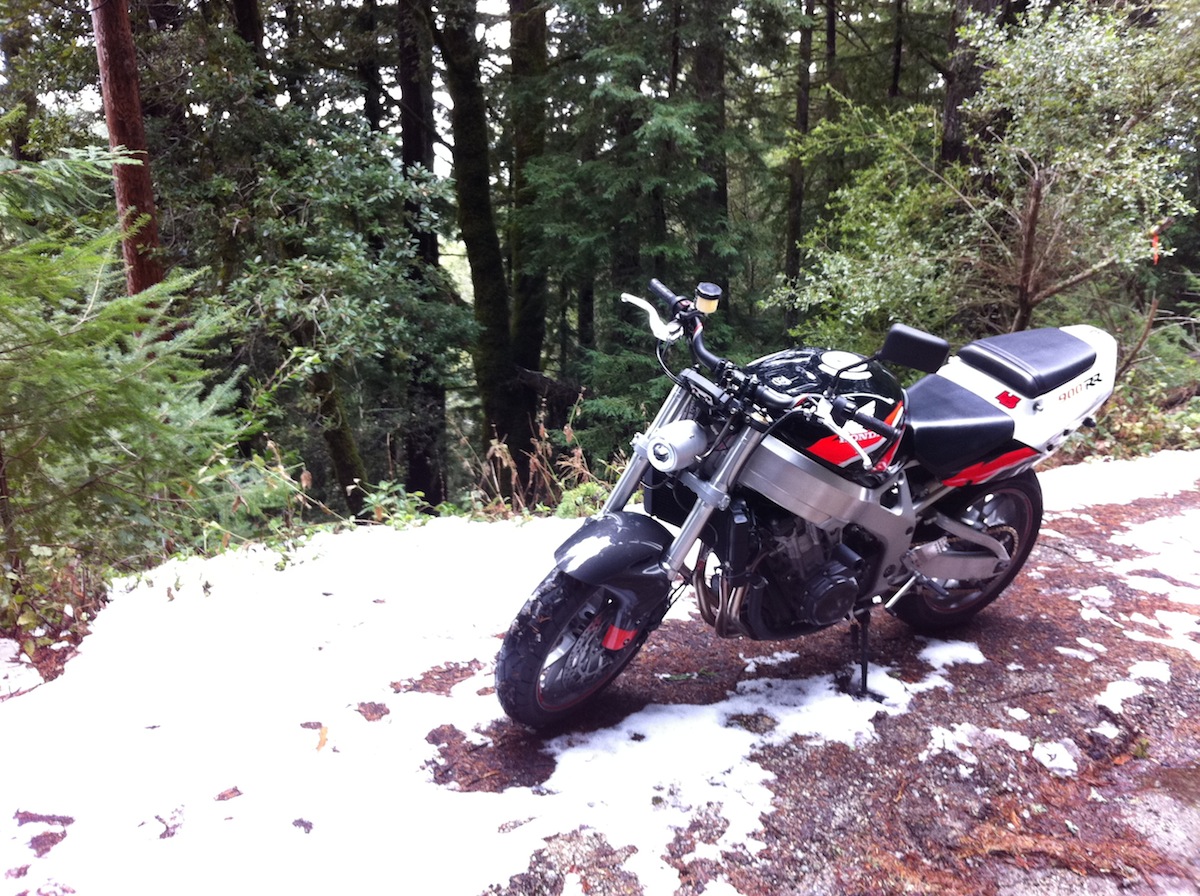
Shortly after I'd gotten the forks and wheels mounted, I took a brisk and slippery ride through the Santa Cruz mtns to check the bike. Note the original levers and lack of carbon fiber flyscreen. YES, that's SNOW.
I then parked the bike for the majority of 2011, losing my desire to ride and generally distancing myself from motorcycling for more than 6 months. I had begun focusing on my Datsun 510 project, and really just needed some time and space away from what I knew and loved, in order to rebuild myself and rediscover what I know and love. In late October of last year, a good friend visited from Spain, and we toured out for a full day's ride. I began to feel passionate again and decided that now was the time to finish my bike and get closer to being who I am - which is the combination of my past and present, not only my past.
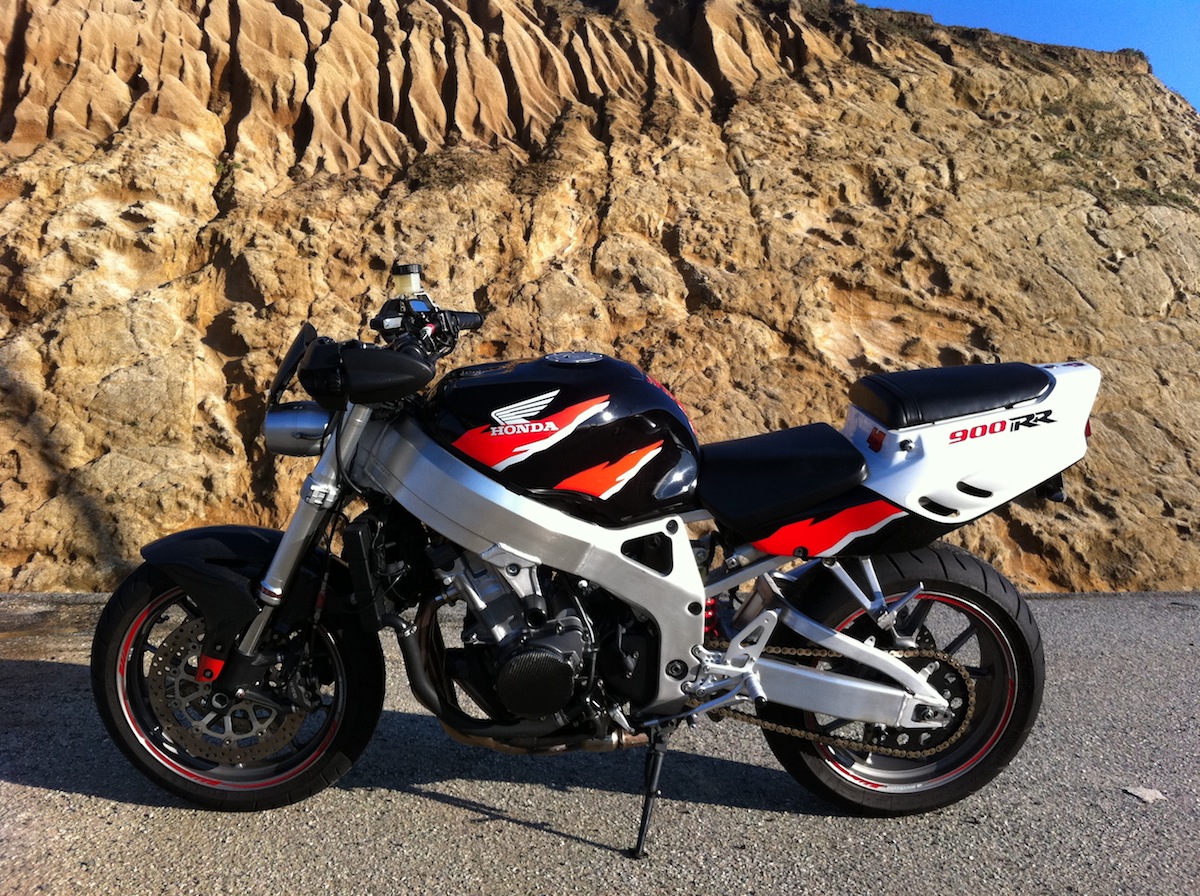
The big rear end visually dominates the bike and make the tail seem heavier than it really is (I really, really miss having a large trunkspace these days). My vision wouldn't be complete without changing all the bodywork, so I was constrained to be a "Slave to fashion". It's often all about compromise, but I didn't want this bike to be compromised at all, so no shortcuts were taken. I actually have plans to make some carbon fiber hardbags for myself so I can tour up and down the coast when the weather is nice (or the timing is right).
I challenged myself to finish the bike within 3 weeks . . . and yes, the bike was "off the road" for this amount of time, something I'm usually reticent to do because I love the freedom of just being able to suit up and forget about everything when I want to go for a ride. I was also realizing that being able to forget was not the real reason I loved riding so much - the focus and concentration demanded by riding well actually helps me think seriously about many things and this helps to grow my mind and spirit.
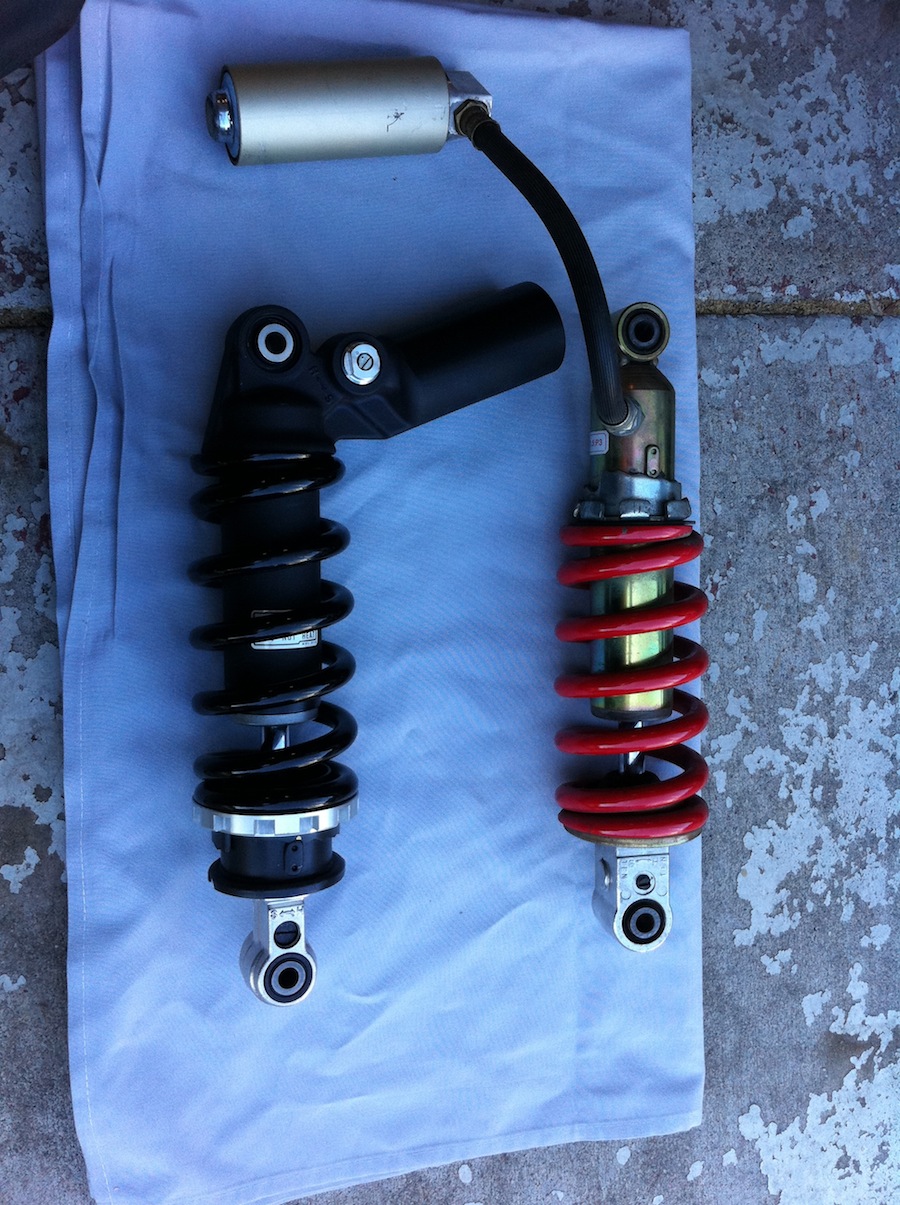
The first step towards getting the rear end situated was ditching the original rear shock for something more modern, such as this beautiful Showa unit used on the 2008+ newer Honda CBR1000RR's. The aluminum shock body helps reduce weight (7.2# original versus 6.0# new = 1.2# lighter, a difference of 17%), and the integrated reservoir looked good but required some modification because the shock res. wouldn't fit under the stock subframe because the battery box brace interfered. Solution? Modify subframe and leave the shock to do its work without issue!
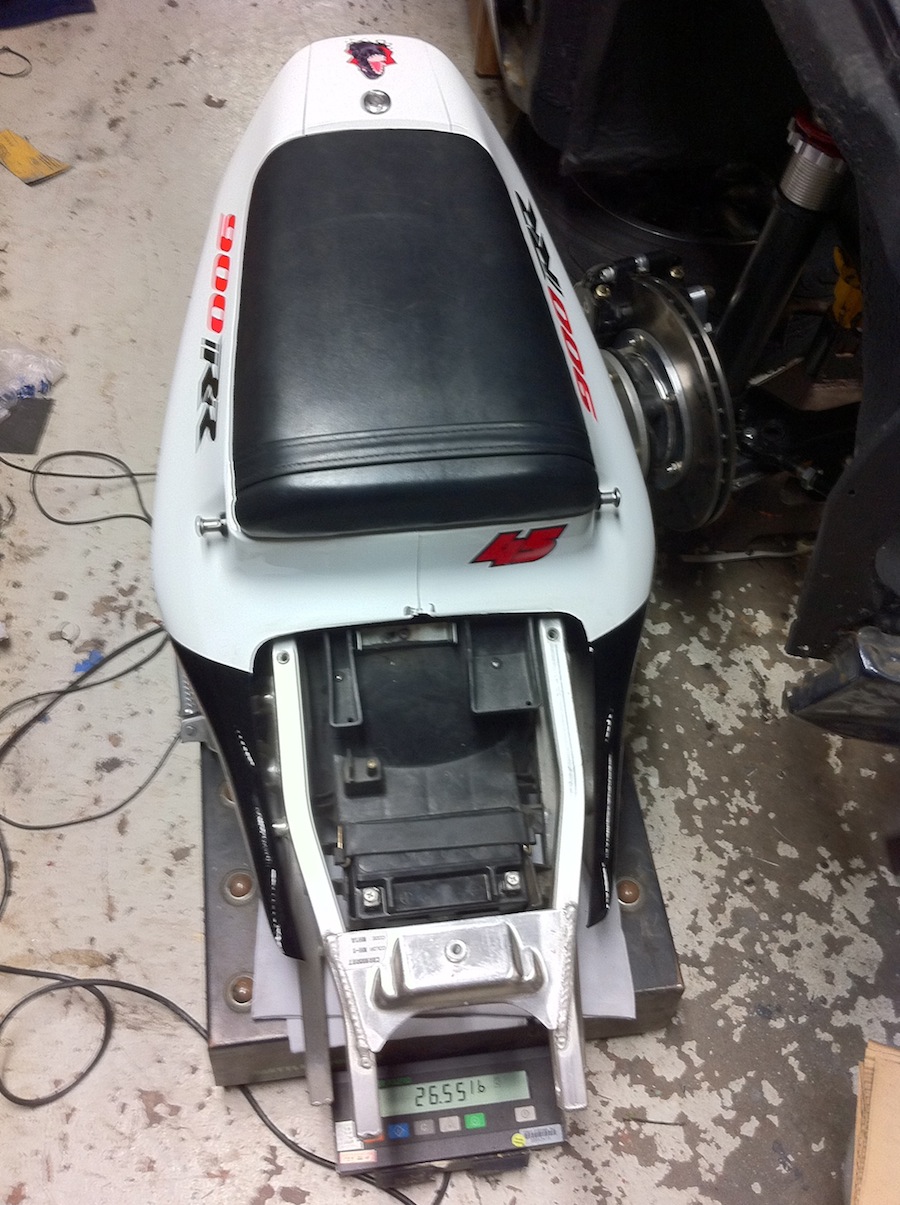
Snip snip went the cutting shears . . . and the tail section and subframe (plus battery) came in at 27 pounds.
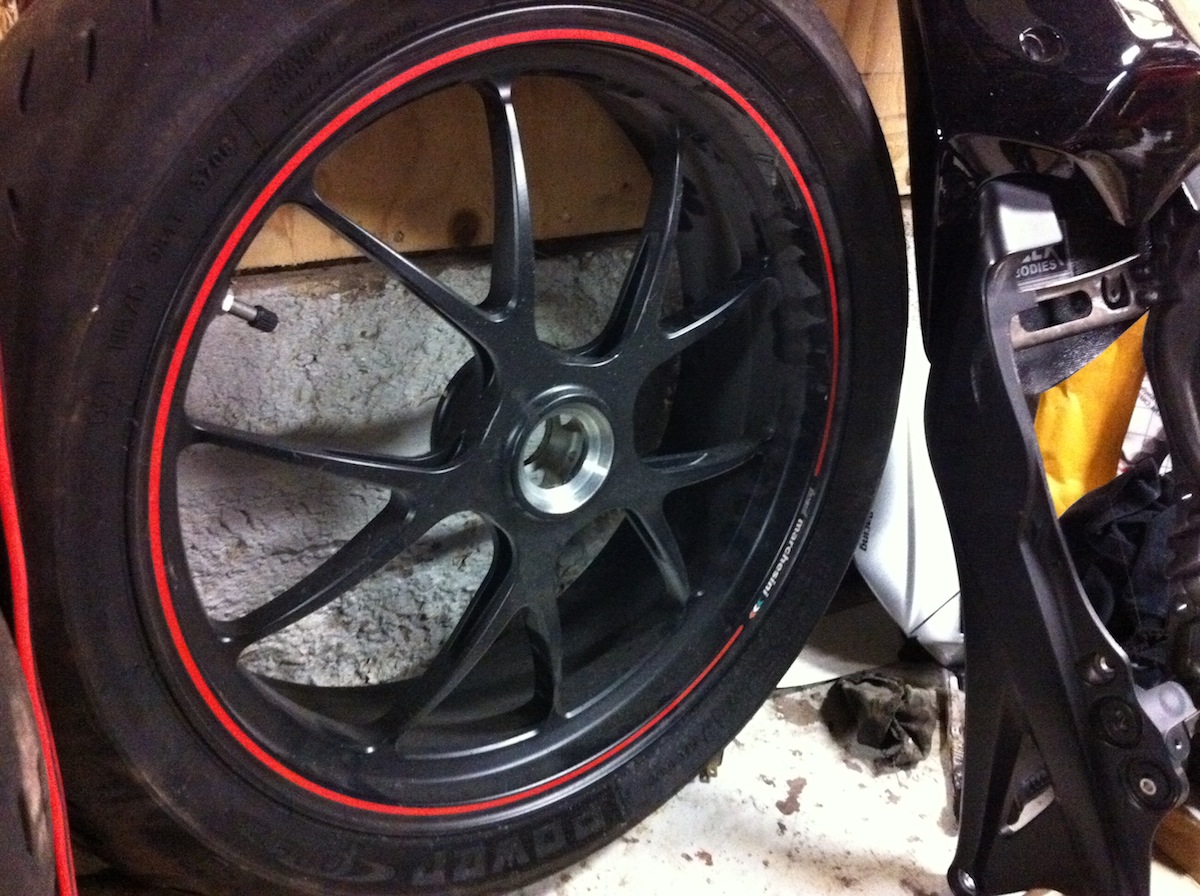
Meanwhile, I had been looking at this dusty, forged Marchesini rear wheel that had been laying around the garage. Ideas had been formed, plans had been made, and it was time to take action. CBR1K subframe sitting next to it was also under consideration . . .
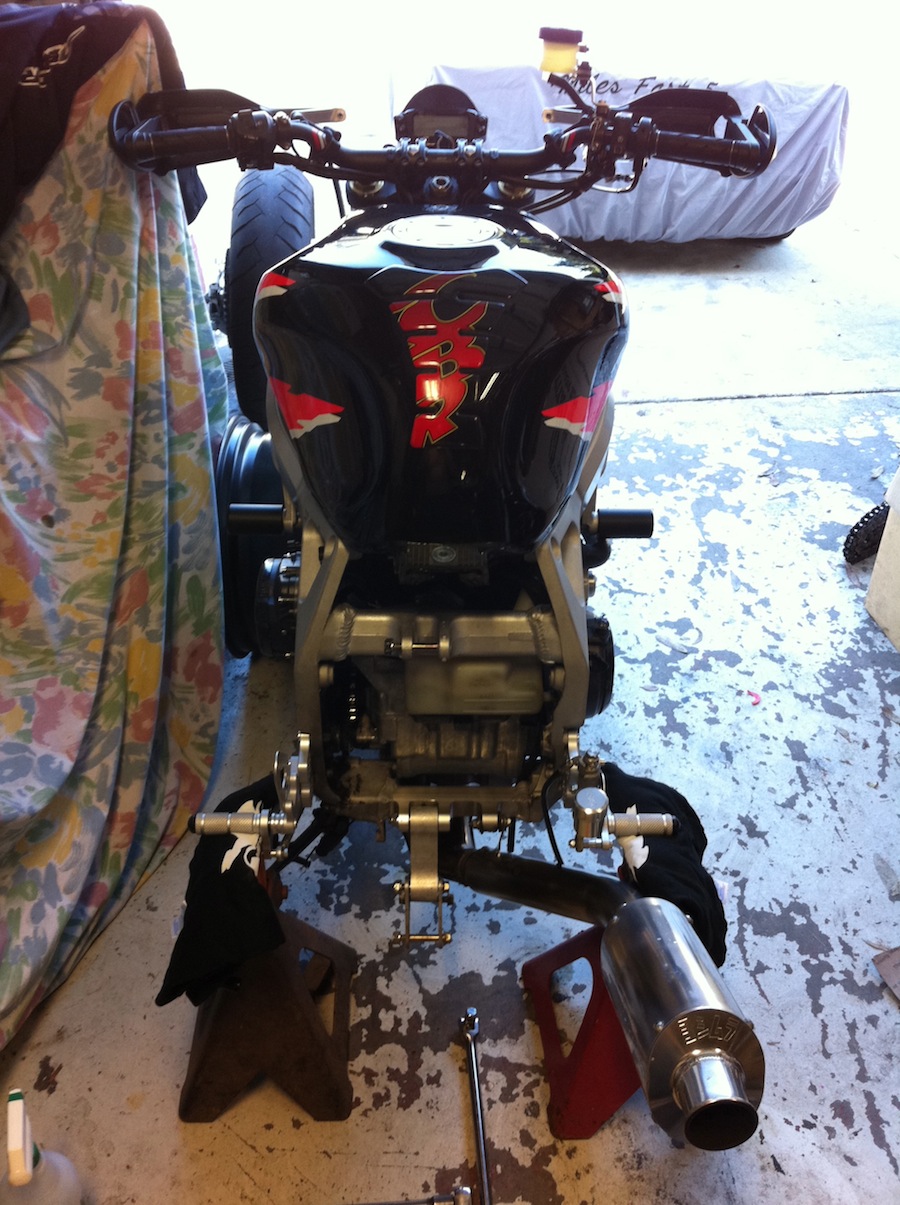
This is how the bike would sit for the next couple weeks. With the swingarm and subframe removed, I had a clear canvas to paint the rear in any direction I wanted. Note the radiator hoses; this is the original routing for the lines.

I know it's old-fashioned, but I like how the bike simply ends at the frame when the rear is removed. I felt like I was working on a wheel barrow at this point.
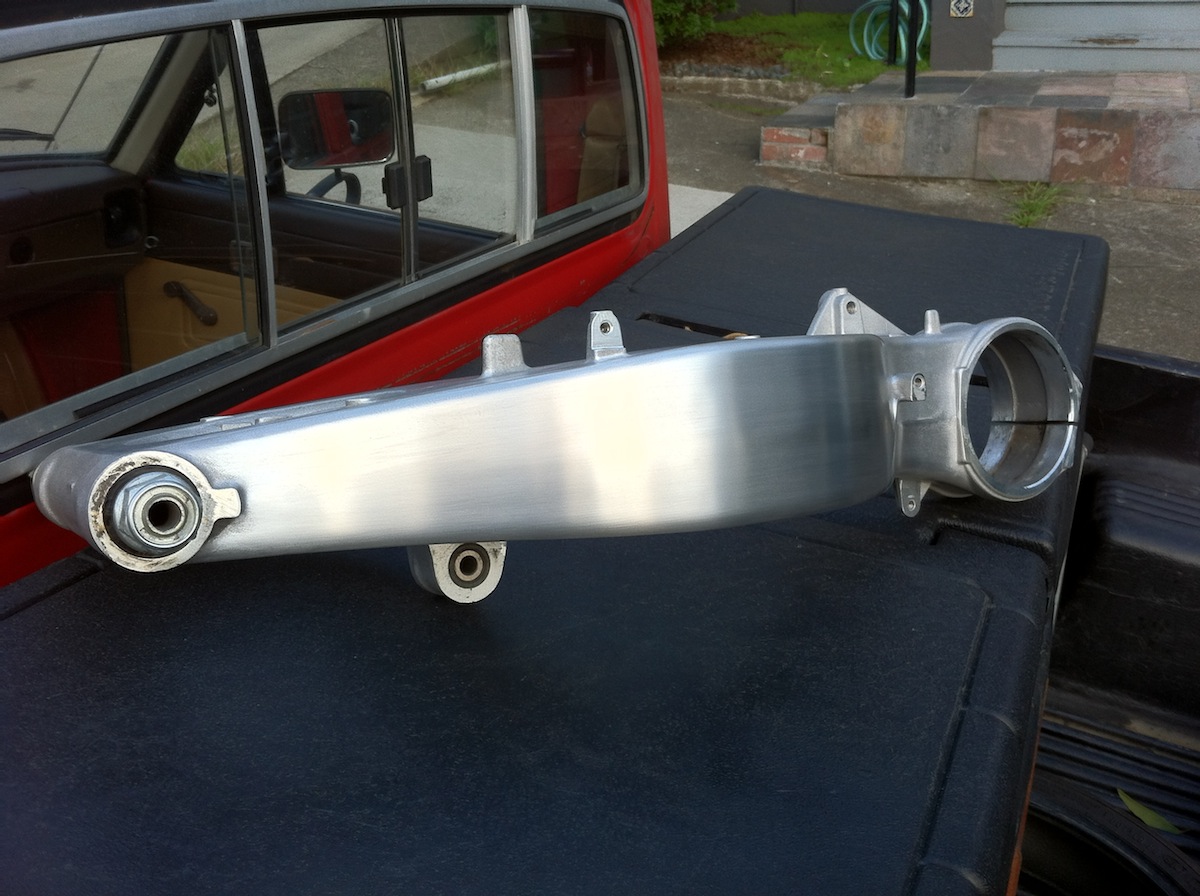
1996 Honda VFR 750 rear swingarm, purchased on eBay from a wrecker in Arizona. It would need some work and was heavily corroded and acid-etched - but it was strong and true.

Orbital sander with water attachment would handle the majority of the flat areas, and would have been perfect for a more standardly shaped box aluminum arm. The VFR arm is one giant curve, and the casting marks were quite deep. I'm not sure what grade of aluminum it's made from, either, as it was noticably more durable, and heavy, compared to other swingarms I've cleaned up.

And clean up it did! This is approximately 8 hours worth of sanding, brushing, buffing, and polishing to achieve the same finish that's on the main frame spars (I spent even more time on the nooks and crannies, but the main parts were done in this photo). Fully polishing it would have looked tacky, in my opinion, and I'm a big fan of brushed aluminum. Even now, I continue to clean this part as HRC does in motoGP . . . with soap and water, steel wool and scotchbrite.
The arm was just part of the equation. The rear single sided Marchesini was meant for a Ducati Hypermotard "S" model, and used a single nut to bolt it to the axle/spindle. The Honda VFR design uses a shorter axle with four studs, exactly like a small automobile uses (the exact same pattern and measurement, 4x100mm). I'd been reading about other people's conversions online, scouring various forums and informational websites, but all the info was misleading, incorrect, and just plain confusing. I decided that the only way I'd be satisfied with the job done would be to examine as many possibilities as I could, make my own measurements, and make my own designs. I trust myself much more these days than I ever have.
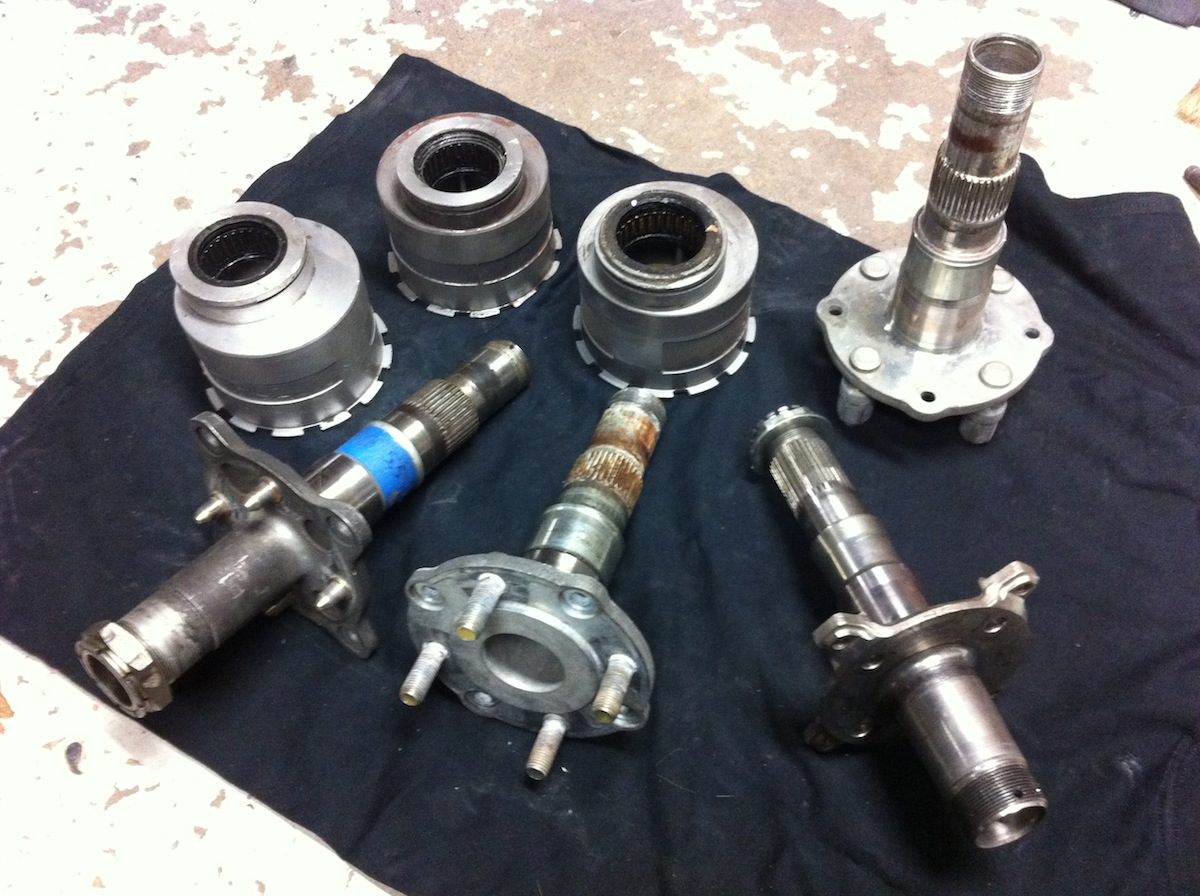
Various hubs and spindles (axles) from Triumph, Honda, and Ducati. There are a few other bits and pieces involved, but using a combination of these three, I would make it work.
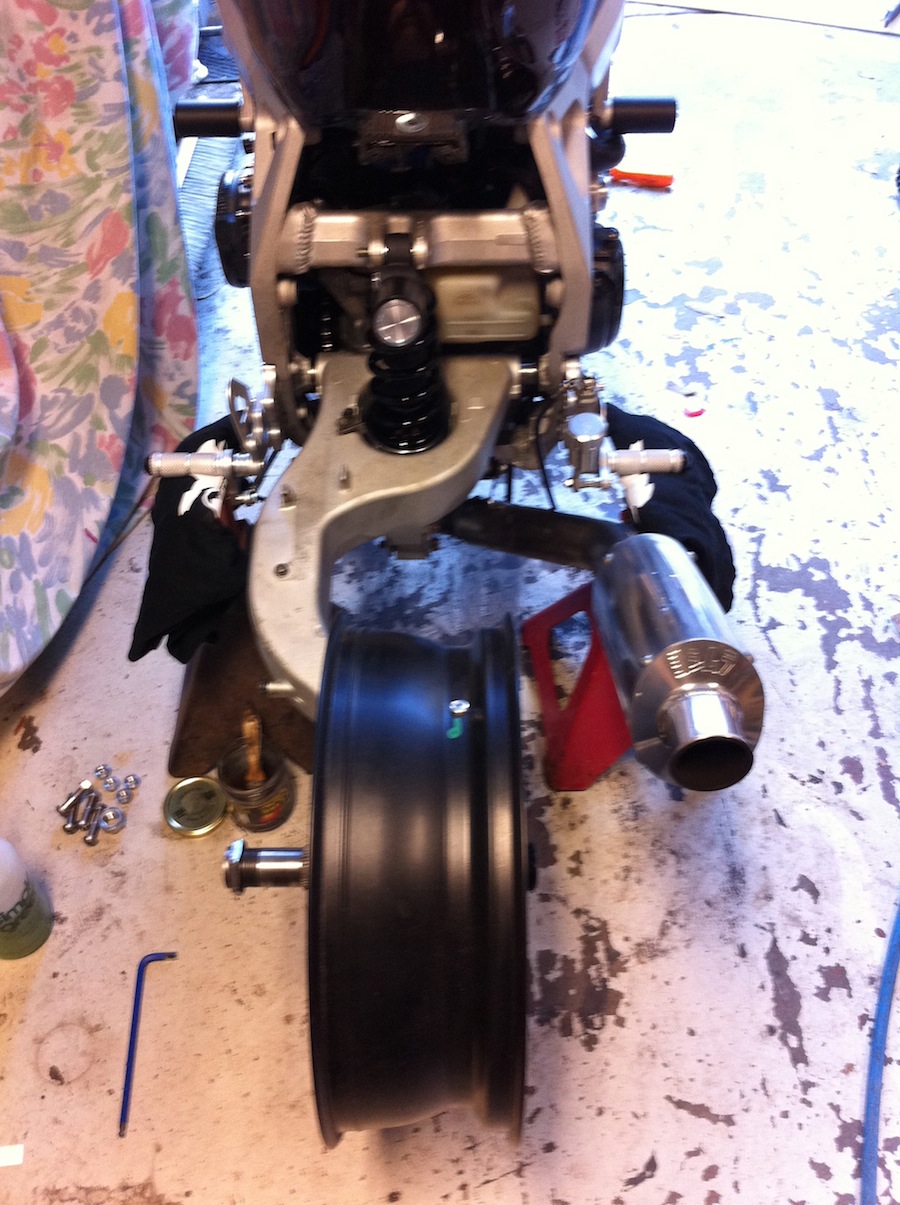
First real mock-up looked very promising, and I was anxious to get the bike back on two wheels as soon as possible.
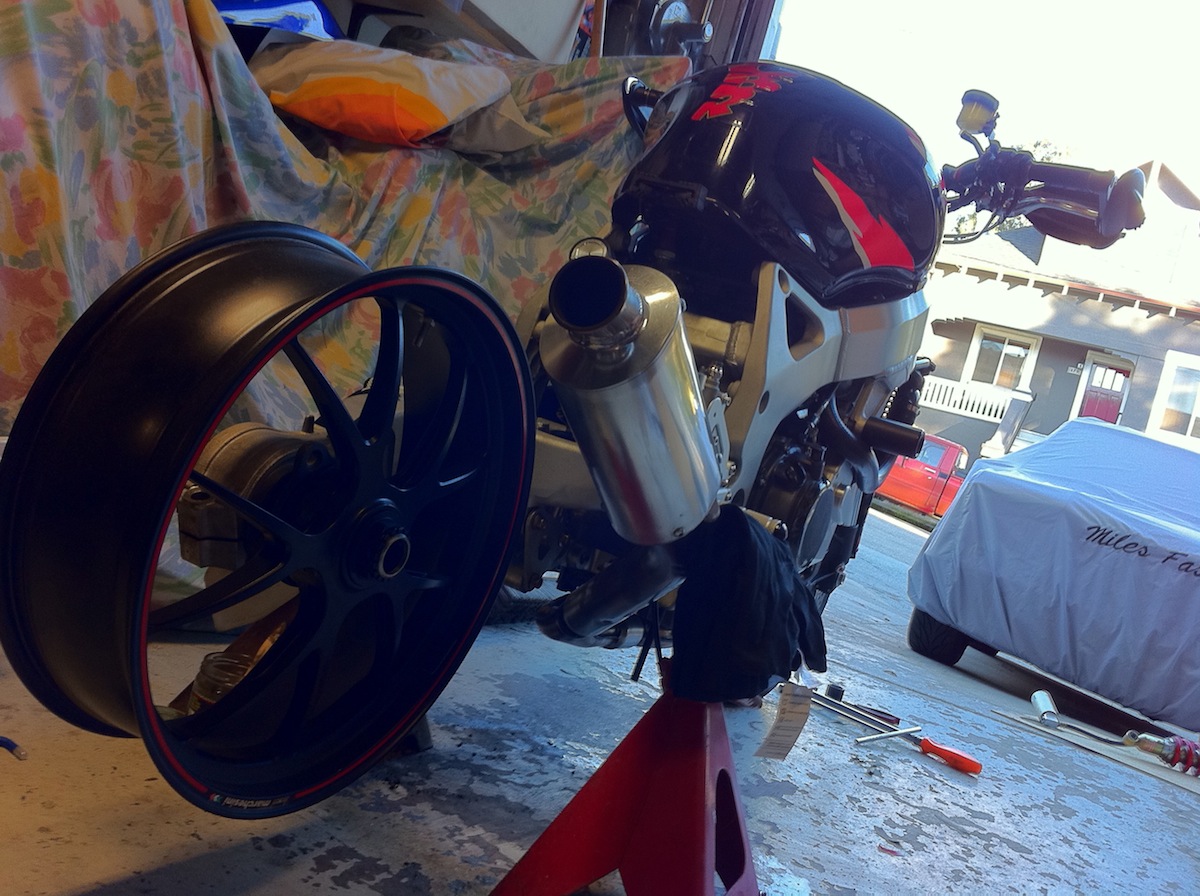
A simple spacer was all that was needed to install the swingarm in the frame, but more importantly, to align the shock mounting points. Fortunately, the big CBR and VFR both use a left biased offset that is almost perfect - makes me wonder if there was some collaboration between the two design teams at some point, or if Honda was considering using a single arm in the CBR for racing purposes (ala RC30/45).
More rear end and mid-section work to follow. Apologies for the blurry iPhone pics.